Learn how to add an overlay views using MapKit!
Update note: This tutorial has been updated for Xcode 9, iOS 11 and Swift 4 by Owen Brown. The original tutorial was written by Ray Wenderlich.
Apple makes it very easy to add a map to your app using MapKit, but this alone isn’t very engaging. Fortunately, you can make maps much more appealing using custom overlay views.
In this MapKit tutorial, you’ll create an app to showcase Six Flags Magic Mountain. For you fast-ride thrill seekers out there, this app’s for you. ;]
[…]
Download the starter project here. This starter includes navigation, but it doesn’t have any maps yet.
Open the starter project in Xcode; build and run; and you’ll see a just blank view. You’ll soon add a map and selectable overlay types here.
[…]
Next, select the Add New Constraints button, add four constraints with constant 0 and click Add 4 Constraints.
To do anything useful with a MapView, you need to do two things: (1) set an outlet to it, and (2) set its delegate.
Open ParkMapViewController in the Assistant Editor by holding down the Option key and left-clicking on ParkMapViewController.swift in the file hierarchy.
[…]
You also need to make ParkMapViewController conform to MKMapViewDelegate.
First, add this import to the top of ParkMapViewController.swift:
[…]
Build and run to check out your snazzy new map!
Wouldn’t it be cool if you could actually do something with the map? It’s time to add map interactions! :]
[…]
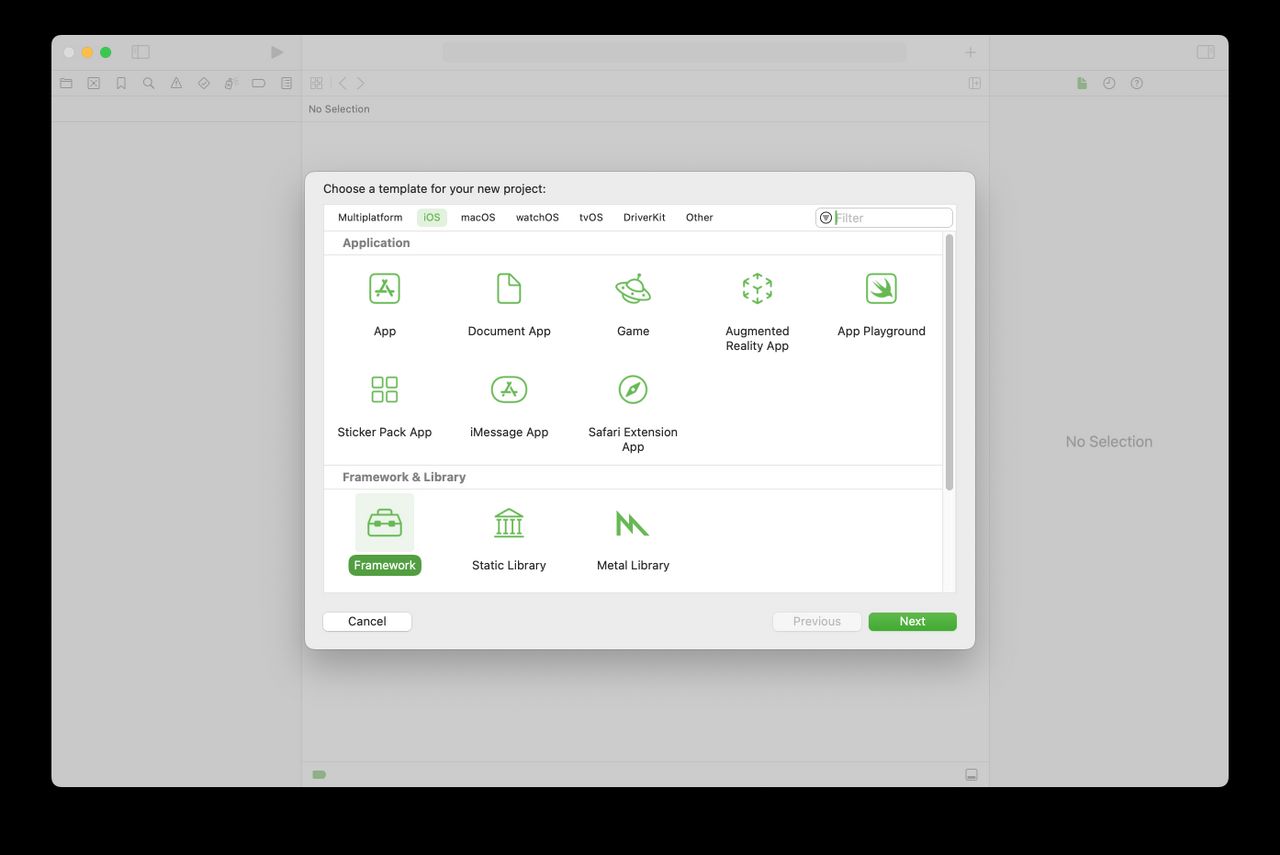
Right-click on the Models group in the file navigation, and choose New File… Select the iOS\Source\Swift File template and name it Park.swift. Replace its contents with this:
[…]
First, the park’s coordinates are extracted from the plist file and assigned to properties. Then the boundary array is set, which you’ll use later to display the park outline.
[…]
Finally, you need a method to create a bounding box based on the overlay coordinates.
[…]
This getter generates an MKMapRect object for the park’s boundary. This is simply a rectangle that defines how big the park is, centered on the park’s midpoint.
Now it’s time to put this class to use. Open ParkMapViewController.swift and add the following property to it:
[…]